

Don’t get “hoodwinked!” – A few lessons learned while setting up new tissue culture hoods
Posted by Stellar Staff on 27th Jul 2016
We were recently invited by a large lab group to problem solve a situation they were facing as they prepared to move into newly renovated lab space. While much thought and planning had gone into the design and placement of their larger equipment items, the same could not be said about secondary needs. Specifically: Where to store their tissue culture supplies as to be immediately accessible with minimal amount of clutter.
The real challenge focused on racks for storing their serological pipettes. In their former space, the hoods had been built into the walls and designed with small areas of “bench” space in between hoods (or the wall)
which were perfect for placing something like this wonderful acrylic serological pipette rack.
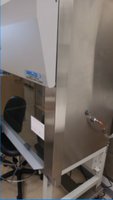
The new lab space features the latest, state-of-the-art hoods with free standing hydraulic legs that rise and lower with the touch of a button (very ergonomic) but no surfaces surrounding them.
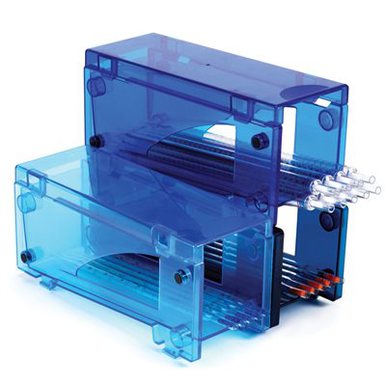
That did not seem to pose much of a problem though, because we have several magnetic serological pipette rack options with which to work, like this ABS rack with attachable hooks for pipette controllers.
However, we quickly made two startling discoveries.
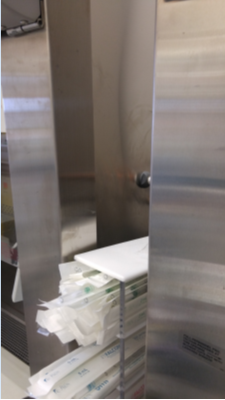
First off: The design of these hoods is such that there is a five-inch gap from the frame of the hood, to the paneling that forms the body of the hood, as can be seen in the image below. Anything attached to the body would be inaccessible to the lab technician at work.
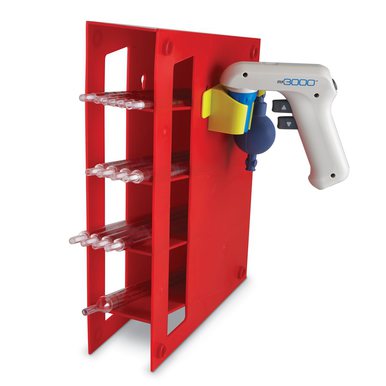
But for that, we had a clever solution. We could use a stackable magnetic system like this serological pipette cargo rack option.
We would build it out, and then up, by interlocking the pieces together (like Lego bricks). While the inner section would be un-usable, the outer blocks would be in clear view.
Our second discovery though, was that these new, highly polished surfaces, are non-magnetic! The only place to offer any sort of grip were the legs, and that was simply not going to work.
The next thought was to attach the serological pipette racks to some other metal device in the tissue culture room. Since they were planning on having their CO2 incubators adjacent to their tissue culture hoods, perhaps we could simply mount these racks to the side of the incubators?
We found this solution to be useful only if the CO2 incubators were fairly old; in the range of ten years or more. It seems that older incubators received a paint job that was cosmetic, hence the magnets in our pipette racks were strong enough to attach to them.
Newer models though, are heavier coated and our magnets would either not stick at all, or the grip was so weak that we could see them slide as soon as we put a few serological pipettes into them.
As a recommendation to anyone manufacturing magnetic devices, we suggest using magnets with a diameter of at least 1.5 to 2 inches to ensure a good grip. We found acrylic glove boxes with large magnets that had no trouble attaching to even heavily painted surfaces.
With those options ruled out, we’ve begun to look for carts which could be placed between the hoods or with casters to allow them to roll and tuck under the tissue culture hoods. Actual laboratory carts are punishingly expensive; we are seeing prices ranging from several hundred dollars to close to a thousand.
Unfortunately for this particular client, they are not permitted to purchase from Target or Walmart. For those who can, it would seem this is the most affordable solution for this problem.
We continue to enthusiastically endorse these great serological pipette rack choices, but we have a better understanding where they are the right fit and where another option is the Stellar choice.