

Is Your Lab Dealing with Contamination Issues? Here are Four Tools To Reduce or Eliminate This Scourge
Posted by Stellar Staff on 1st Sep 2019
There is almost no heartbreak equal to losing months of painstaking work to laboratory contamination.
Dreaded mycoplasma, nefarious bacteria and other stubborn biological materials can wipe out entire projects resulting in significant lost time and money.
With so many moving pieces and a variety of actors with access to the lab, having a well though-out protocol to reduce the likelihood of contamination is a critical part of every lab manager duties.
In additional to frequent wipe downs with EtOH, here are four valuable tools to aid in the battle against lab contamination.
1. Purchase an incubator that comes with high-heat decontamination:
More and more manufacturers are adding a high-heat decontamination feature to their CO2 cell-culture incubators.
Similar to the self-cleaning oven, these incubators have a cleaning cycle that elevates the interior temperature to approximately 180C and holds the temperature there for about two hours; effectively destroying all living matter.
Questions to ask when considering a high-heat decontamination CO2 incubator are:
- How long is the decontamination cycle, how long is the incubator out of use till it is complete?
- Does the CO2 sensor have to be removed prior to operating the decontamination cycle or can it be left in place?
At Stellar Scientific we recommend the Shel Lab SCO6AD six cubic foot CO2 incubator with nine-hour high-heat decontamination cycle which is so simple to operate.
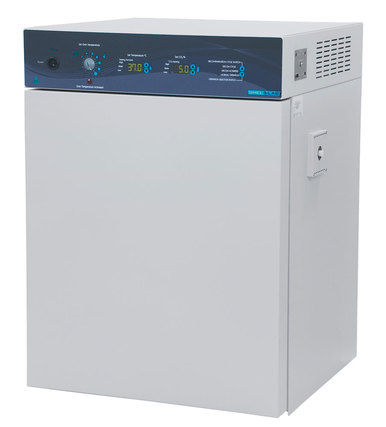
Just lock the incubator door and begin the cycle. The IR sensor stays in place throughout. Turn it on before leaving the lab at night and by morning the incubator is clean and ready to go.
2. Only use filter tips with your micro pipettes -
Yes, they are about 20-30% more expensive than non-filter tips but one contamination incident is going to cost the lab dearly, far more than the ounce of prevention making the move to only filter tips.
Look for a pipette tip with a barrier filter that is packed tightly to prevent contaminants from entering the pipette tips cone (where they can be very difficult to remove), yet breathable to not interfere with the air displacement needed for supremely accurate liquid handling.
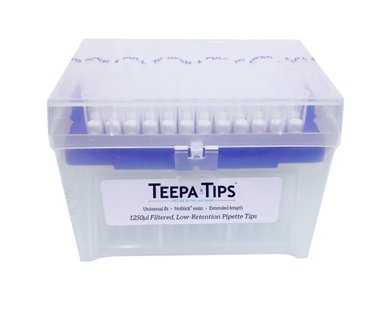
Stellar Scientific's Teepa Tip family of barrier filter-tips meet and exceed research lab expectations for performance and protection.
3. Use your UV hood correctly -
What's the point of having a fancy bio-safety cabinet complete with ultraviolet light if it isn't being used effectively?
If you place your pipettes into the hood and rely on the UV light to decontaminate them, take care that the entire surface of the pipette shaft is being bombarded with UV light for enough time to degrade the potential contaminate DNA.
This means:
- Pipettes are not stacked on one another or organized in such a way as to cast a shadow on one another
- Pipettes are rotated (yes, like in an oven)
- Pipettes are bathed in UV light for at least 28 minutes
4. Purchase a nUVaclean decontaminating pipette stand -
Want to simplify the process of keeping pipettes clean and contaminate free?
Here is a tool that is so simple even an entry-level student can be trusted to use it correctly.
Insert up to six micro pipettes (holds almost all common brands) and push the start button.
This triggers a UV decontamination cycle that shuts off automatically following the recommended twenty-eight minute time required to effectively destroy over 99.9% of DNA.
Watch the video for a complete explanation how the nUVaclean decontaminating pipette stand works:
Whether setting up a new lab, upgrading a lab or looking for the latest innovation and tools to improve your lab, choose Stellar Scientific as your trusted lab supplier with the insight and know-how to take good care of you.